How to Make a Business Flyer in Word
Got a tight budget but a need to spread a new message? The digital age makes it possible to churn out a professional looking flyer—without having to pay someone to do it for you.
 |
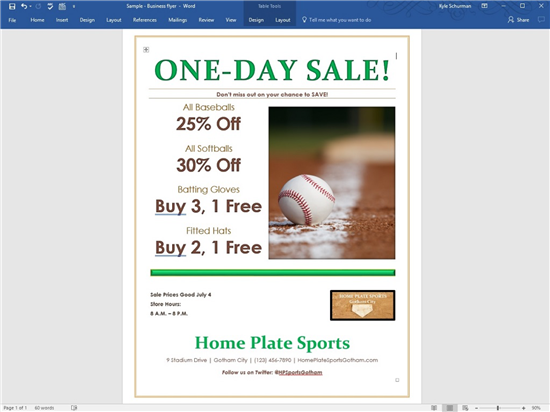
| © CreditDonkey |
All you need is one of Microsoft Word's templates and an idea of what you want to say.
Microsoft Word has many templates that simplify the process of creating your own documents with some flare. Incorporating graphics, photographs, colors, and attention-grabbing text into your project becomes an easy process through Word, even if you have little to no design experience.
Setting Up Your Flyer
Think about the message you want to convey. Are you having a sale or are you announcing an event? Are you mostly trying to introduce people to the goods and services your small business offers? Do you have photos or logos in mind?
Next, think more deeply about what you want to say. Some people prefer to sketch out the words or draw an idea of how they want the layout to look. Other people just wing it and do everything on the screen. There's no right or wrong way to create your own business flyer in Microsoft Word. Follow whatever process makes the most sense to you.
1. Find the templates
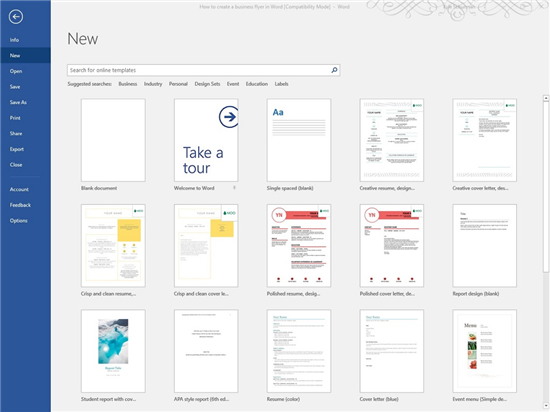 |
As you open Word, icons representing several potential templates will appear on the screen. (If you already are working in Word, click "File" and "New" to see the icons for the templates.)
2. Select a template
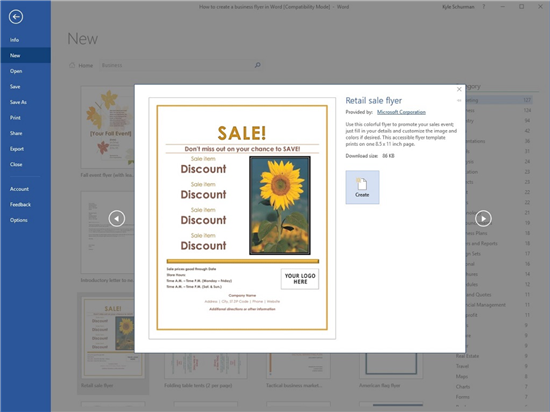 |
Use the ideas you considered during the preparation phase to figure out the best template for your particular situation. (Word will be downloading the templates from the Internet, so you must have an active Internet connection to use this feature.)
To narrow your search, type "business" in the search bar or click "Business" in the suggested search area near the top of the screen. You'll also see some subcategories you could browse through.
After narrowing the search as far as you want, scroll through the icons on the screen to find one that meets your needs for this project. To find our template, we selected "Marketing" in the subcategory list and then clicked on the "Retail Sale Flyer" icon.
Once you click on a template icon, you'll see a larger sample of the template appear on the screen. If you're sure that's the template you want to use, click "Create" to start using it.
3. Save, save, and then save again
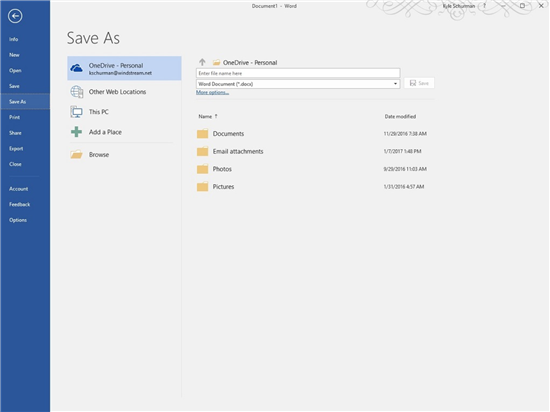 |
Before we go any further, save your document (if you haven't already). Click the "File" menu and "Save As." Then give the file a unique name and store it in a folder that you can easily find again later. Although Word automatically saves your document after a certain amount of time, you should save your work regularly too.
Some people find it helpful to save multiple copies of a flyer as they work on it. Should you make a change to the flyer that you don't like or can't undo, you can go back to one of the previous versions that you liked. You just have to save the document under a different name each time.
4. Enter your text
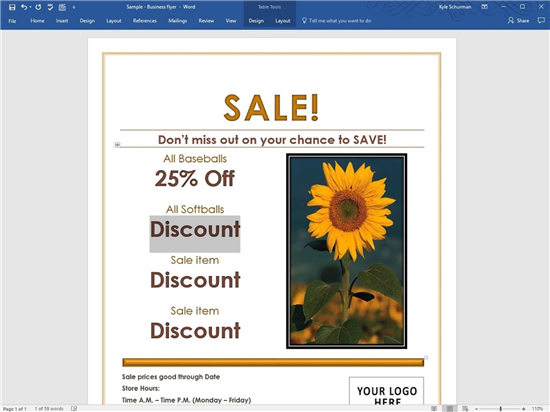 |
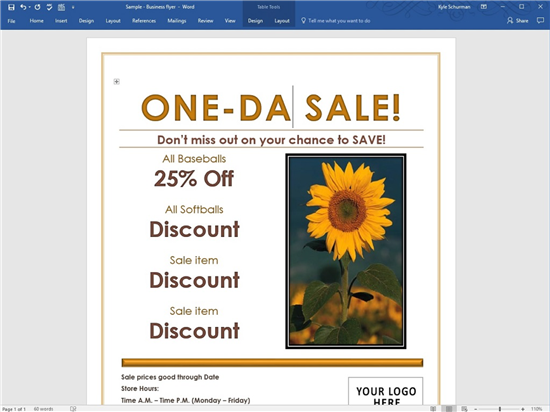
Now enter the text that applies to your business. (Keeping all of the generic text isn't going to draw many customers!)
Think of each line of text in the flyer template as a separate text block. Just click on the text block you want to change to enter your own information. Word will highlight the entire text block with a gray background. Once it's highlighted, simply begin typing to change the text.
In our sample, we started by replacing "Sale Item" and "Discount" with "All Baseballs" and "25% Off," and continued from there.
5. Edit to make it yours
 |
You may find that you can use some of the text that's in the template. For example, in our sample flyer, we decided to leave "Don't miss out on your chance to SAVE!" across the top.
When you do want to edit anything, click on the box, and you'll see Word highlight it in gray, as we described earlier. Then press the left arrow key on the keyboard to cause a cursor to appear in the text block. (If you previously edited this particular text block, the cursor will appear instead of the gray highlighting.) Move the cursor to the front of the text block and begin typing to edit the existing text.
There may be some text lines on the template that you really don't want to use at all. In our sample, we decided to take out the line for store hours for Saturday and Sunday. All you have to do is highlight the text and delete it.
6. Change the text size
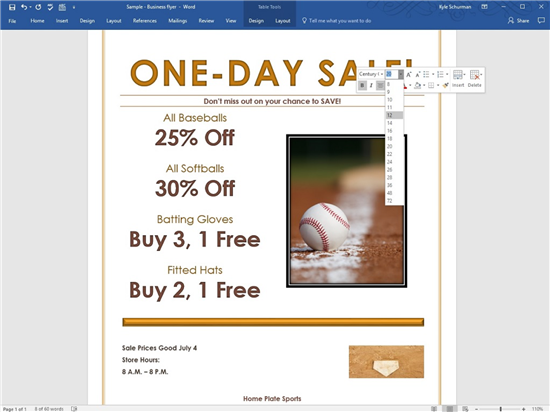 |
We've decided to shrink the size of the second line of text. We just highlighted the text and then right-clicked on it. Along the top of the pop-up menu, you'll see a text size menu. Left-click on it and pick the new text size you want to use.
7. Change the text color and font
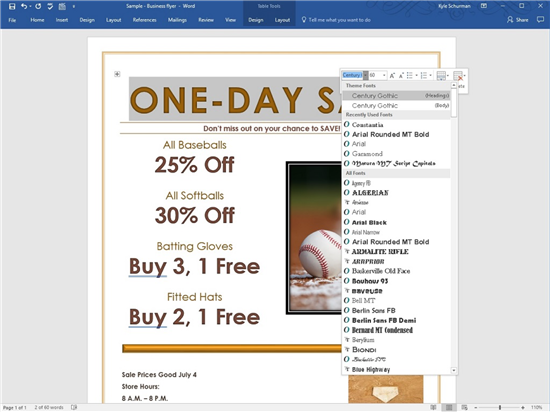 |
Next, we've decided to change the font and color of text of "ONE-DAY SALE" and our company name to make them stand out from the remainder of the flyer. Highlight the text you want to change and right-click on it. We're going to pick a serif font (small decorative lines at the ends of each letter stroke) to stand out from the page's primary font, which is a sans-serif font. See the difference?
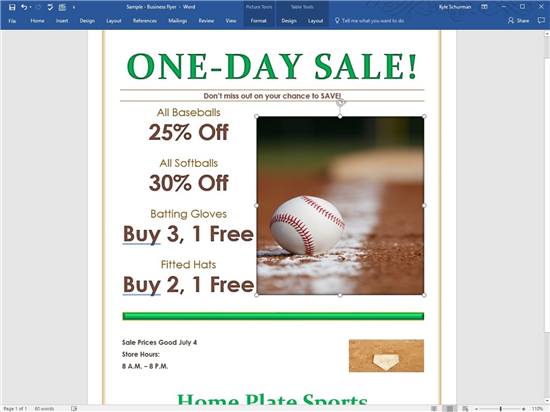
Next, we'll change the text color. Again, highlight the text box and right-click on it. Just below the text size box, you can pick a new font color. We're going to change the color of the thick line in the middle of the page to green to match our accent font color. Again, just right-click on it to pick the new color from a pop-up menu.
8. Add a logo and photo
Once you've entered the text you want, you can make changes to the photos, logos, and graphics on the flyer template. We've replaced the sunflower photo with one of a baseball.
To make a swap: Right-click on the photo, then left-click on "Change Picture" in the pop-up menu. Find the location of the photo and click on it. Then click "Insert" to place it on the page.
We need to mention here that the Word template automatically resizes your photo to make it fit the page. You'll want to use a photo that's similarly aligned to the photo on the template. You can use a simple program like Microsoft Paint to crop a horizontally-aligned photo and turn it into a vertical image.
Follow the same process to add a logo to the page.
9. Edit the photo area
 |
In our sample template, we decided we didn't like the double black line border around the photograph. Right-click on the photo to change this. Scroll to the bottom of the pop-up menu and left-click "Format Picture." You'll see a series of commands appear on the right side of the Word window.
Click the icons across the top of the right side of the window to see some of your options for changing aspects about the photo. To change the line for the border line around the photo, click the "paint can" icon along the top of the right side of the page. Then click the triangle next to "Line" to see the options for the border line. To completely remove the thick line, click "No Line." To shrink the size of the line, click the width box to pick a smaller number for the line width.
Once you've made the changes, click the small "X" box in the "Format Picture" area on the right side to close that area. (Don't click the "X" box for the entire Word file in the far upper right though, or you'll close the entire file.)
10. Resize the photo
 |
Finally, we wanted to make our photo larger on the page. Left-click on it to see the border with eight dots around it. Click on one of the dots and hold down the button. Then drag the cursor outward to increase the size of the photo (or inward to decrease the size of the photo).
Hold down the Shift key at the same time you're dragging one of the dots to maintain the same aspect ratio you had when you started. This is a smart idea. If you don't maintain the aspect ratio, the photo could be stretched abnormally and look like a mistake.
Finished Flyer
 |
At this point, you're ready to send out your flyer. Before sending it, make sure you've saved it and proofread it (more than once). It's usually a good idea to set the flyer aside for a couple of hours after you've finished it and then come back to it. You may see some things with fresh eyes that you could improve.
Bottom Line
It does take a bit of practice to create flyers quickly in Word. But once you've created a few flyers, you'll wonder why you ever hired someone to perform this process for you in the past!
Write to Kyle Schurman at feedback@creditdonkey.com. Follow us on Twitter and Facebook for our latest posts.
|
|
|